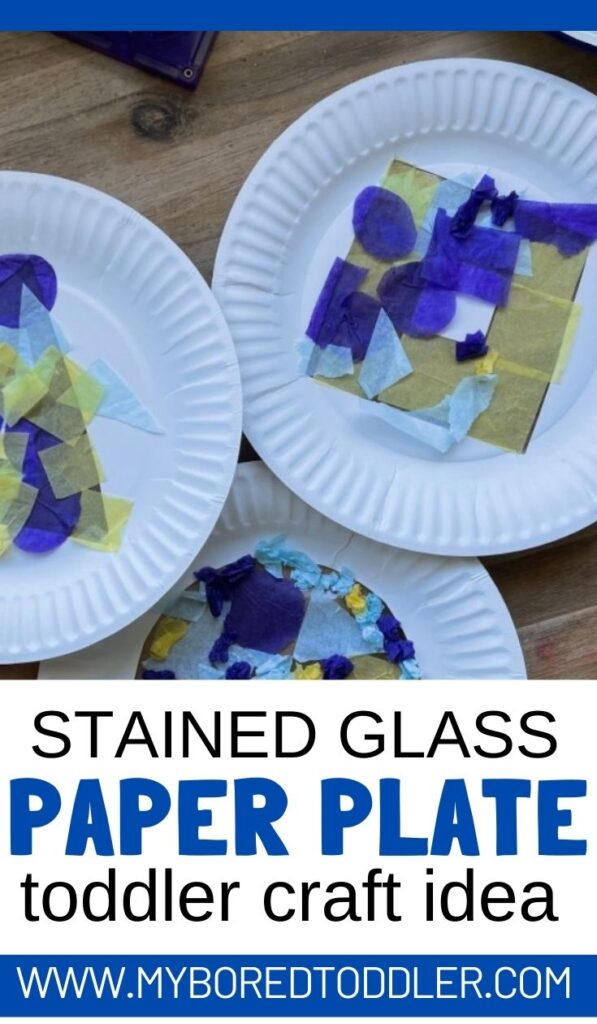
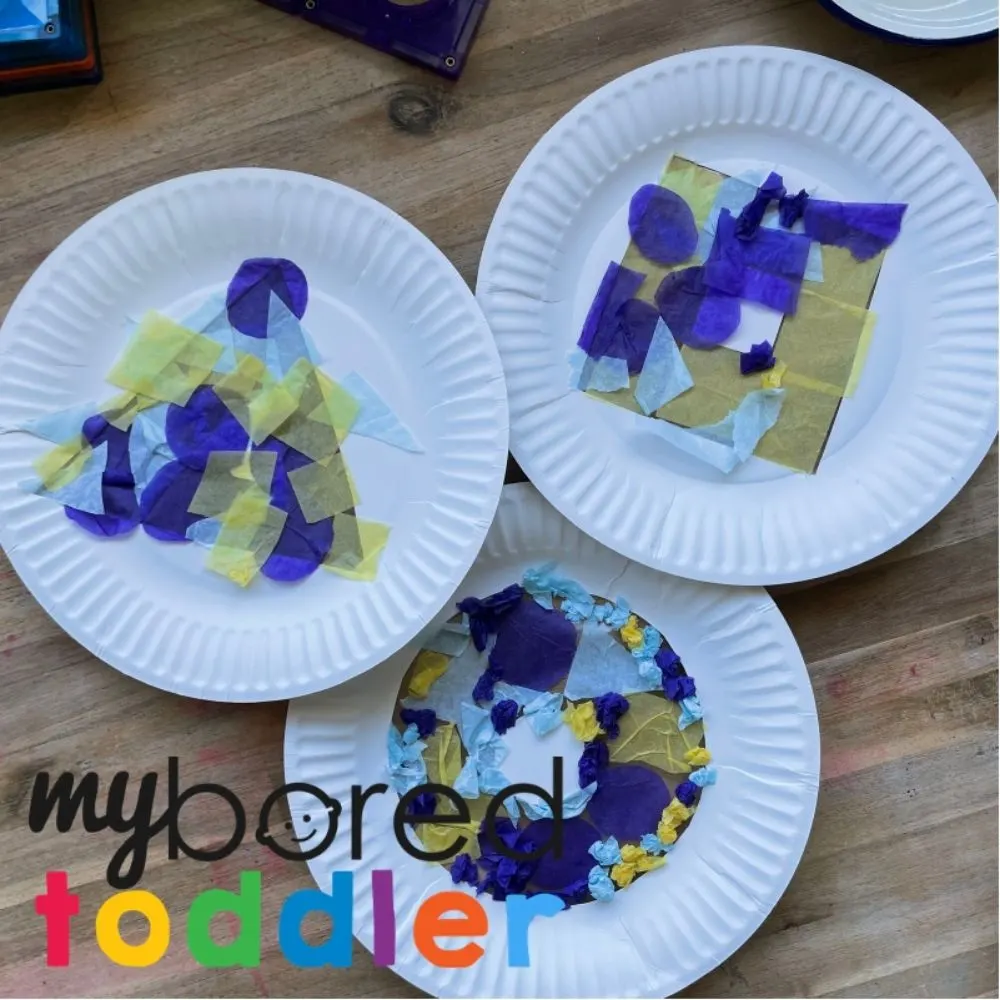
Learning about shapes doesn't need to be a formal, sit-down activity. With this paper plate shape stained glass activity, your toddler can have the opportunity to learn about shapes easily.

![]()
![]()
Paper Plate Shape Stained Glass
We love paper plate crafts for toddlers. Paper plates are such a versatile resource. We love to use them in our crafts and play ideas. They are the perfect foundation for this easy papercraft.
The technique used to create these DIY suncatchers is easy, versatile, and effective. Even younger toddlers can join their older siblings in creating their own designs.
Just so we are clear, this activity does not actually involve glass. Papercraft all the way!
The effect you are about to create resembles beautiful stained glass perfectly!
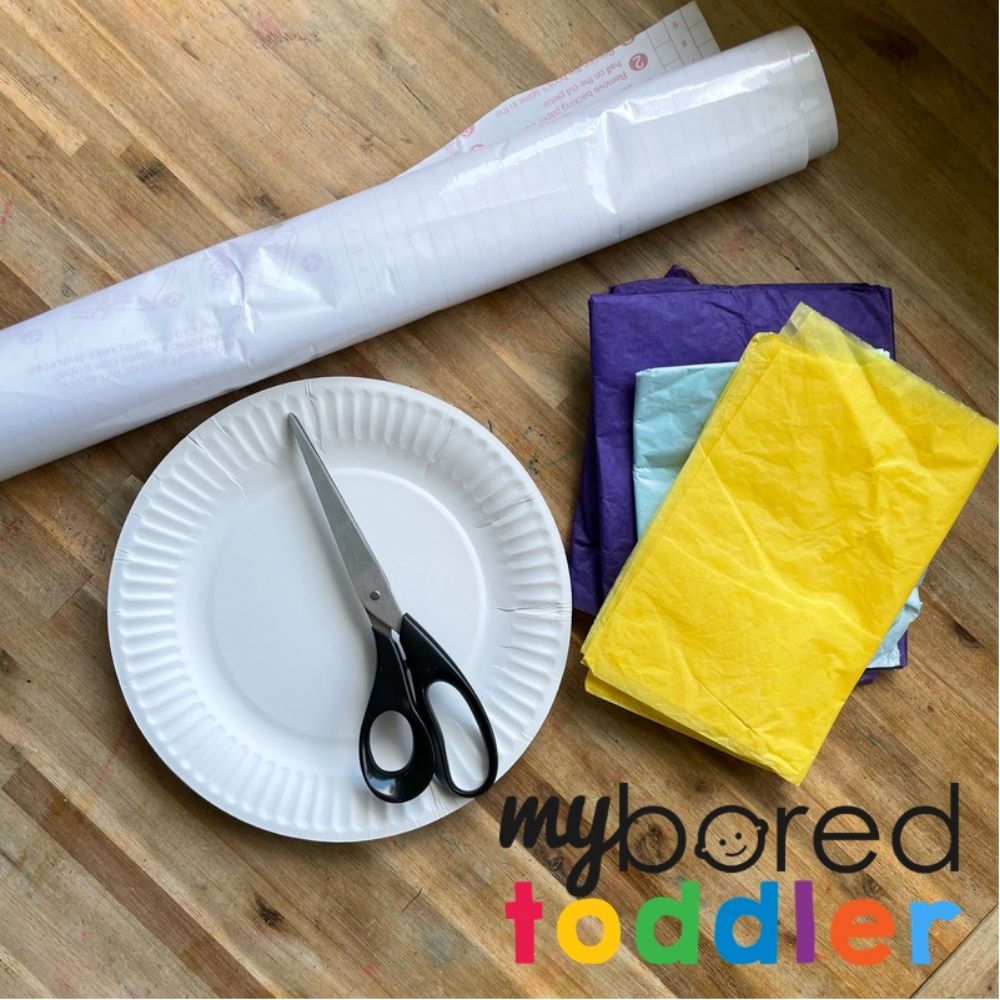

What you need to make a Paper Plate Stained Glass:
- Paper Plate - I always like to keep a big pack in our craft box.
- Tissue Paper (Purple, yellow, and blue)
- Scissors
- Clear Contact
We used tissue paper of three different colours. You can use more or less depending on what you have on hand. I would encourage you to use at least a couple as overlapping some colours will impact the effect.
Clear contact is also known as clear book covering. It is the clear, thin sticky film used to protect books and is great for loads of sticky play ideas!
How to Make your Paper Plate Shape Stained Glass:
There are a couple of options in setting up this activity. If you think your toddler is capable, you can have them do some of the cutting out. Using scissors is a great way to strengthen fine motor skills, hand-eye coordination, and bilateral coordination. This craft could be a great way of encouraging the development of these important life skills.
If your toddler may struggle, please do the preparation yourself. Your child can still be involved by passing you items and choosing the order in which the steps are taken.
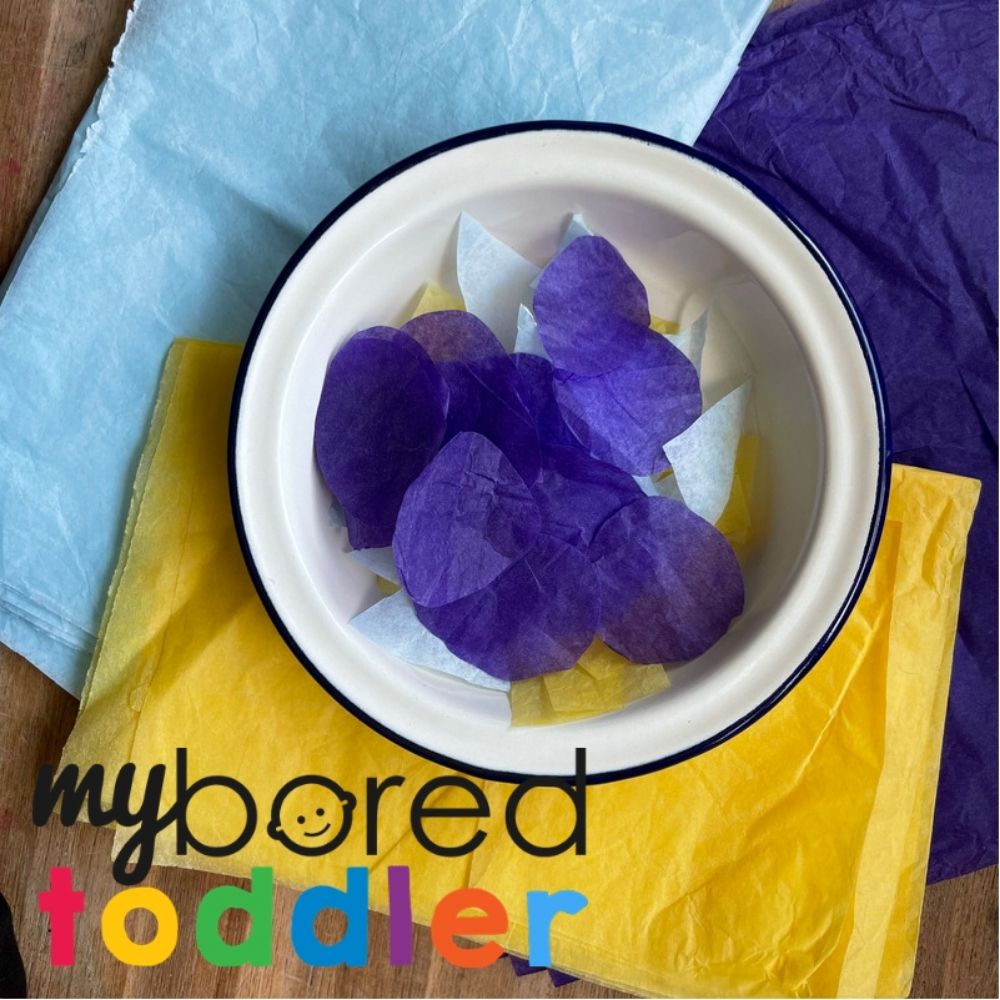

What we need is the paper plate frame to be made and shapes cut from the tissue paper.
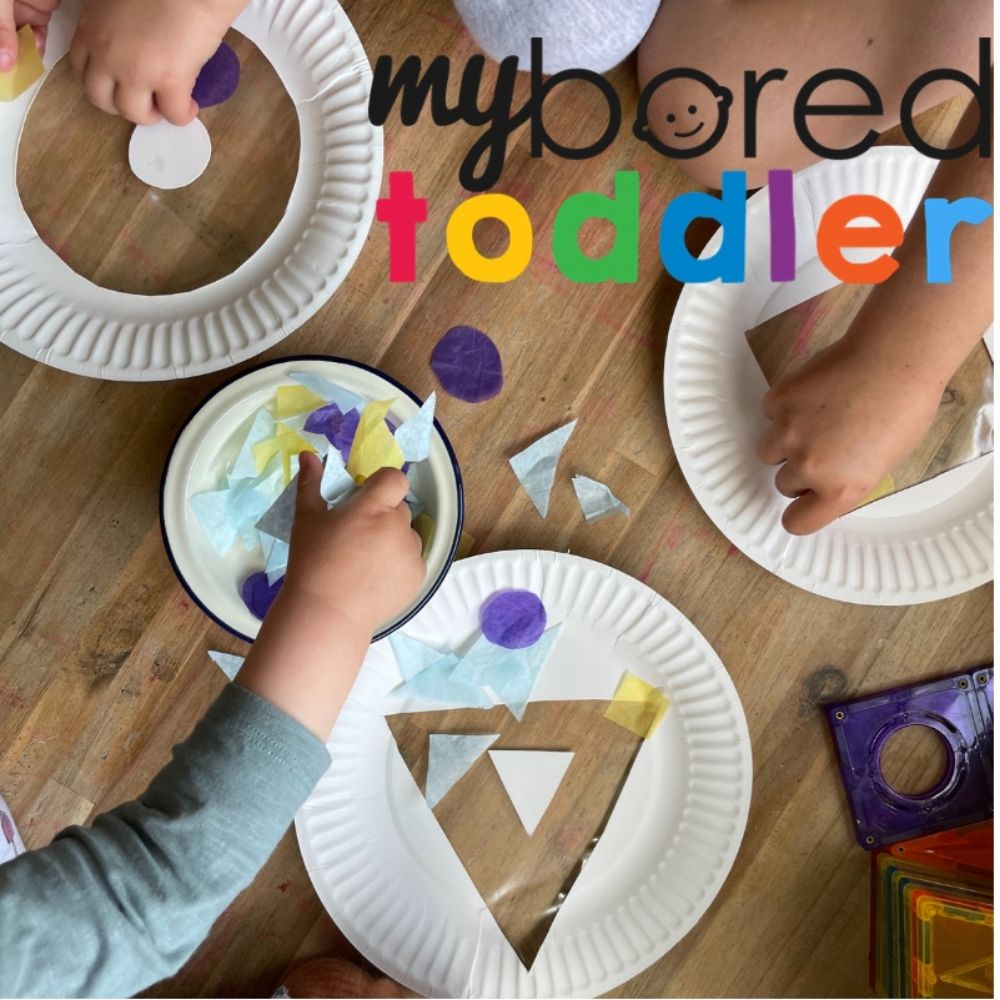
To assist in learning the names of the shapes, we cut one shape from each colour of tissue paper.
- Purple Circles
- Yellow Squares
- Blue Triangles
Using your scissors cut out the different shapes from your tissue paper.
Now, in all my years setting up activities for children, I have never once had a child complain about the circles being perfectly round, squares with exact 90-degree angles, or triangles with each side the same length. Relax and please don’t get caught up on the shapes being perfect. Your child will love them!
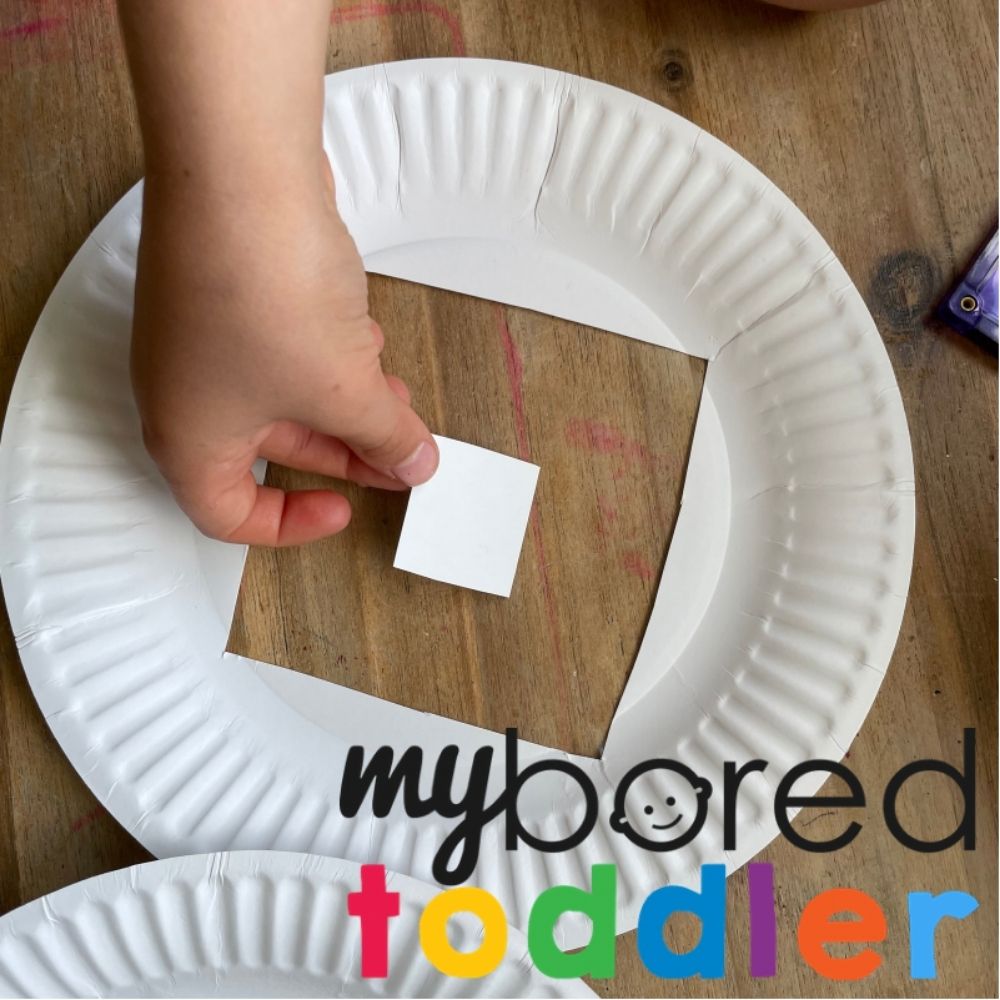

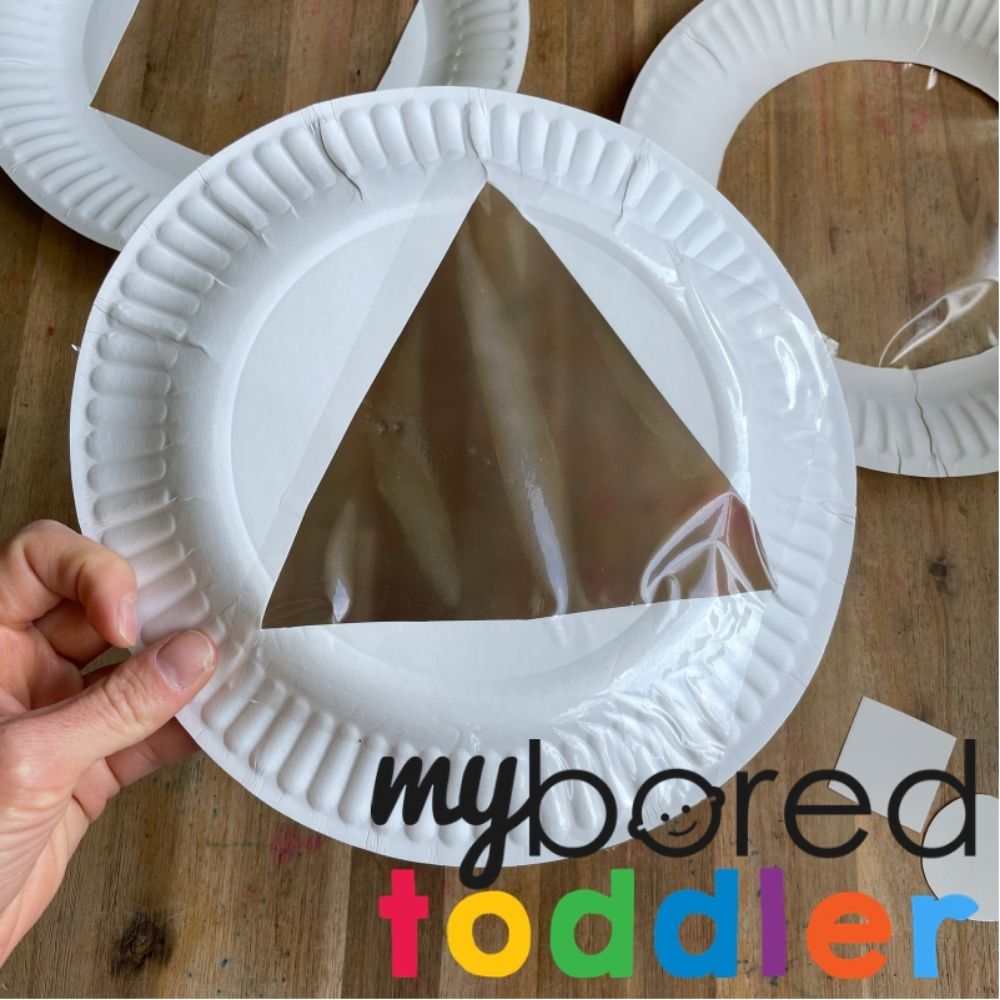
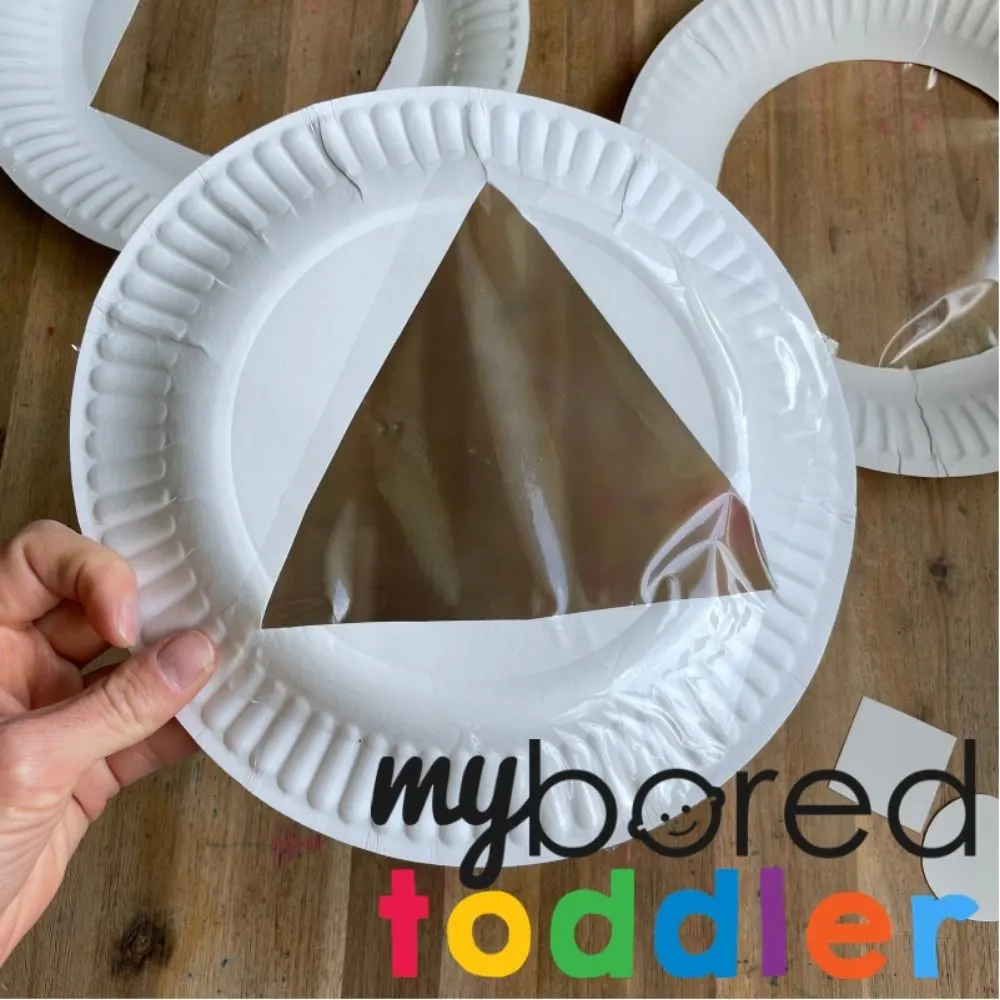
When trimming the shape from the centre of your plate, retain the inner piece you remove. This will be used to create the centerpiece of the stained glass. Simply trim it so that it can be positioned in the centre of the void with plenty of space for the stained glass paper pieces.
Cut a square of contact to cover the void cut out of the paper plate. It should be a finger width wider than the hole to ensure there is space for it to have contact and stick to the paper plate. Remove the paper backing and adhere it to the back of your paper plate.
Take the small shape you saved and position it in the middle of the sticky contact.
You are all ready to start to add colour and texture to your paper plate shape stained glass craft!
The rest is super easy! There are no rights or wrongs here. Let your toddler’s creativity lead the way.
When we made ours, we started off laying the tissue paper shapes across the sticky contact. We were talking about the name of the shapes and colours as we stuck them to our plates. Fingers were busy positioning the pieces and hands were pressing them flat.

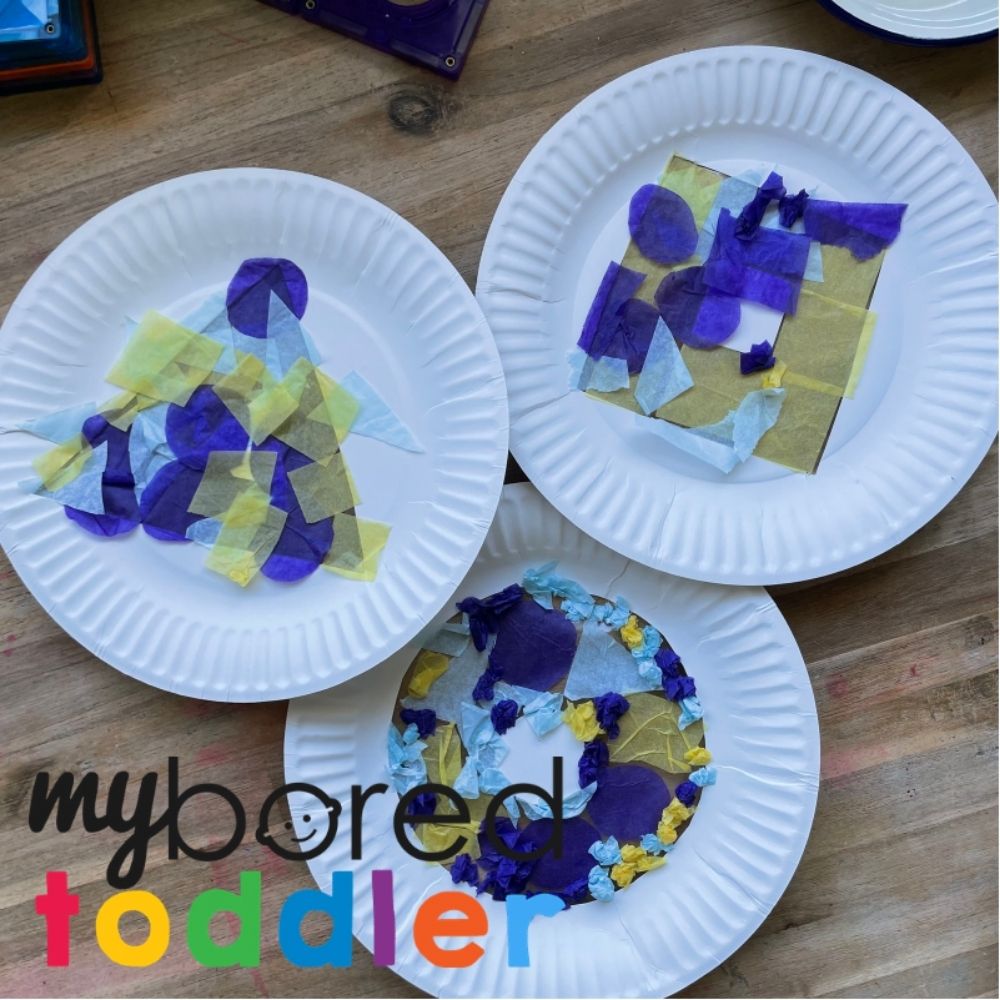
Then Miss 4 started to scrunch up her shapes before placing them onto the contact. As she held up her work to inspect the effect with the light coming through from behind, the scrunched pieces looked really effective.
Once complete, your stained glass paper plate can be stuck to a sunny window. The centerpiece shape will stand out beautifully against the contrasting colours of the tissue paper.
This paper plate shape stained glass craft is so easy and versatile! Add a shape a week to create some window bunting or further expand your child’s knowledge of shapes. This really is such a great indoor activity to do at home with your toddler.
For more fun toddler activity ideas why not join our Facebook Group or follow us on Instagram – follow @myboredtoddler and use #myboredtoddler.
SOME MORE FUN TODDLER ACTIVITY IDEAS YOU MIGHT ENJOY ARE:
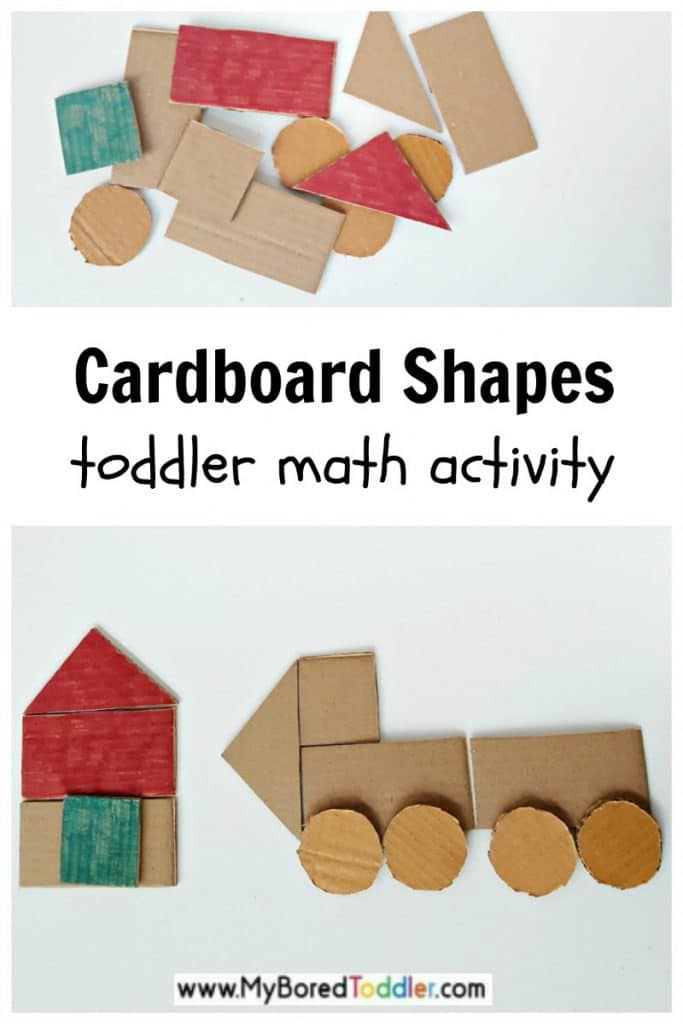
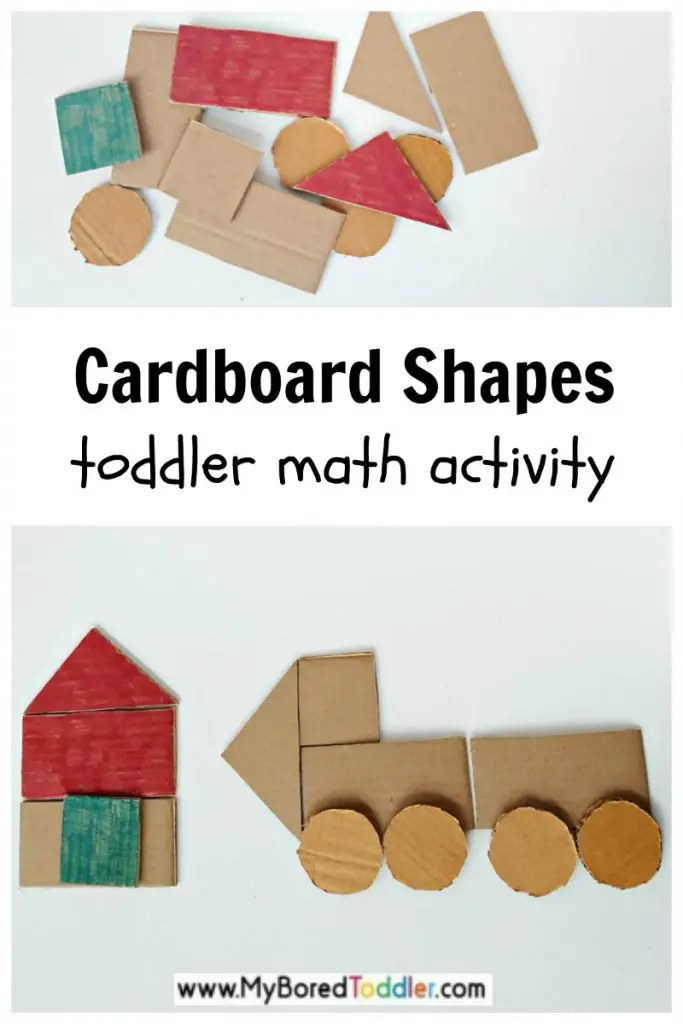
Cardboard Shapes- Easy Toddler Craft Activity
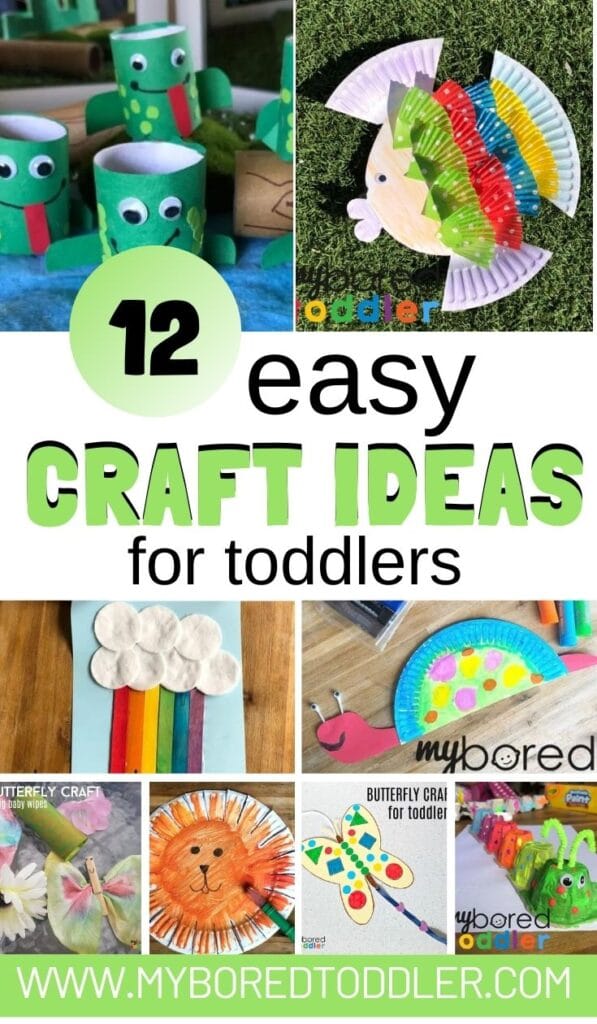
12 Easy Crafts for Toddlers

About the Author
Dani is a busy stay-at-home Mum of 3 and an early childhood teacher in training who is passionate about play-based learning throughout early childhood. For educational play ideas that you can do at home and parenting tips visit Play Inspired Mum Check her out on Instagram andFacebook